Products Designed for Themed Entertainment
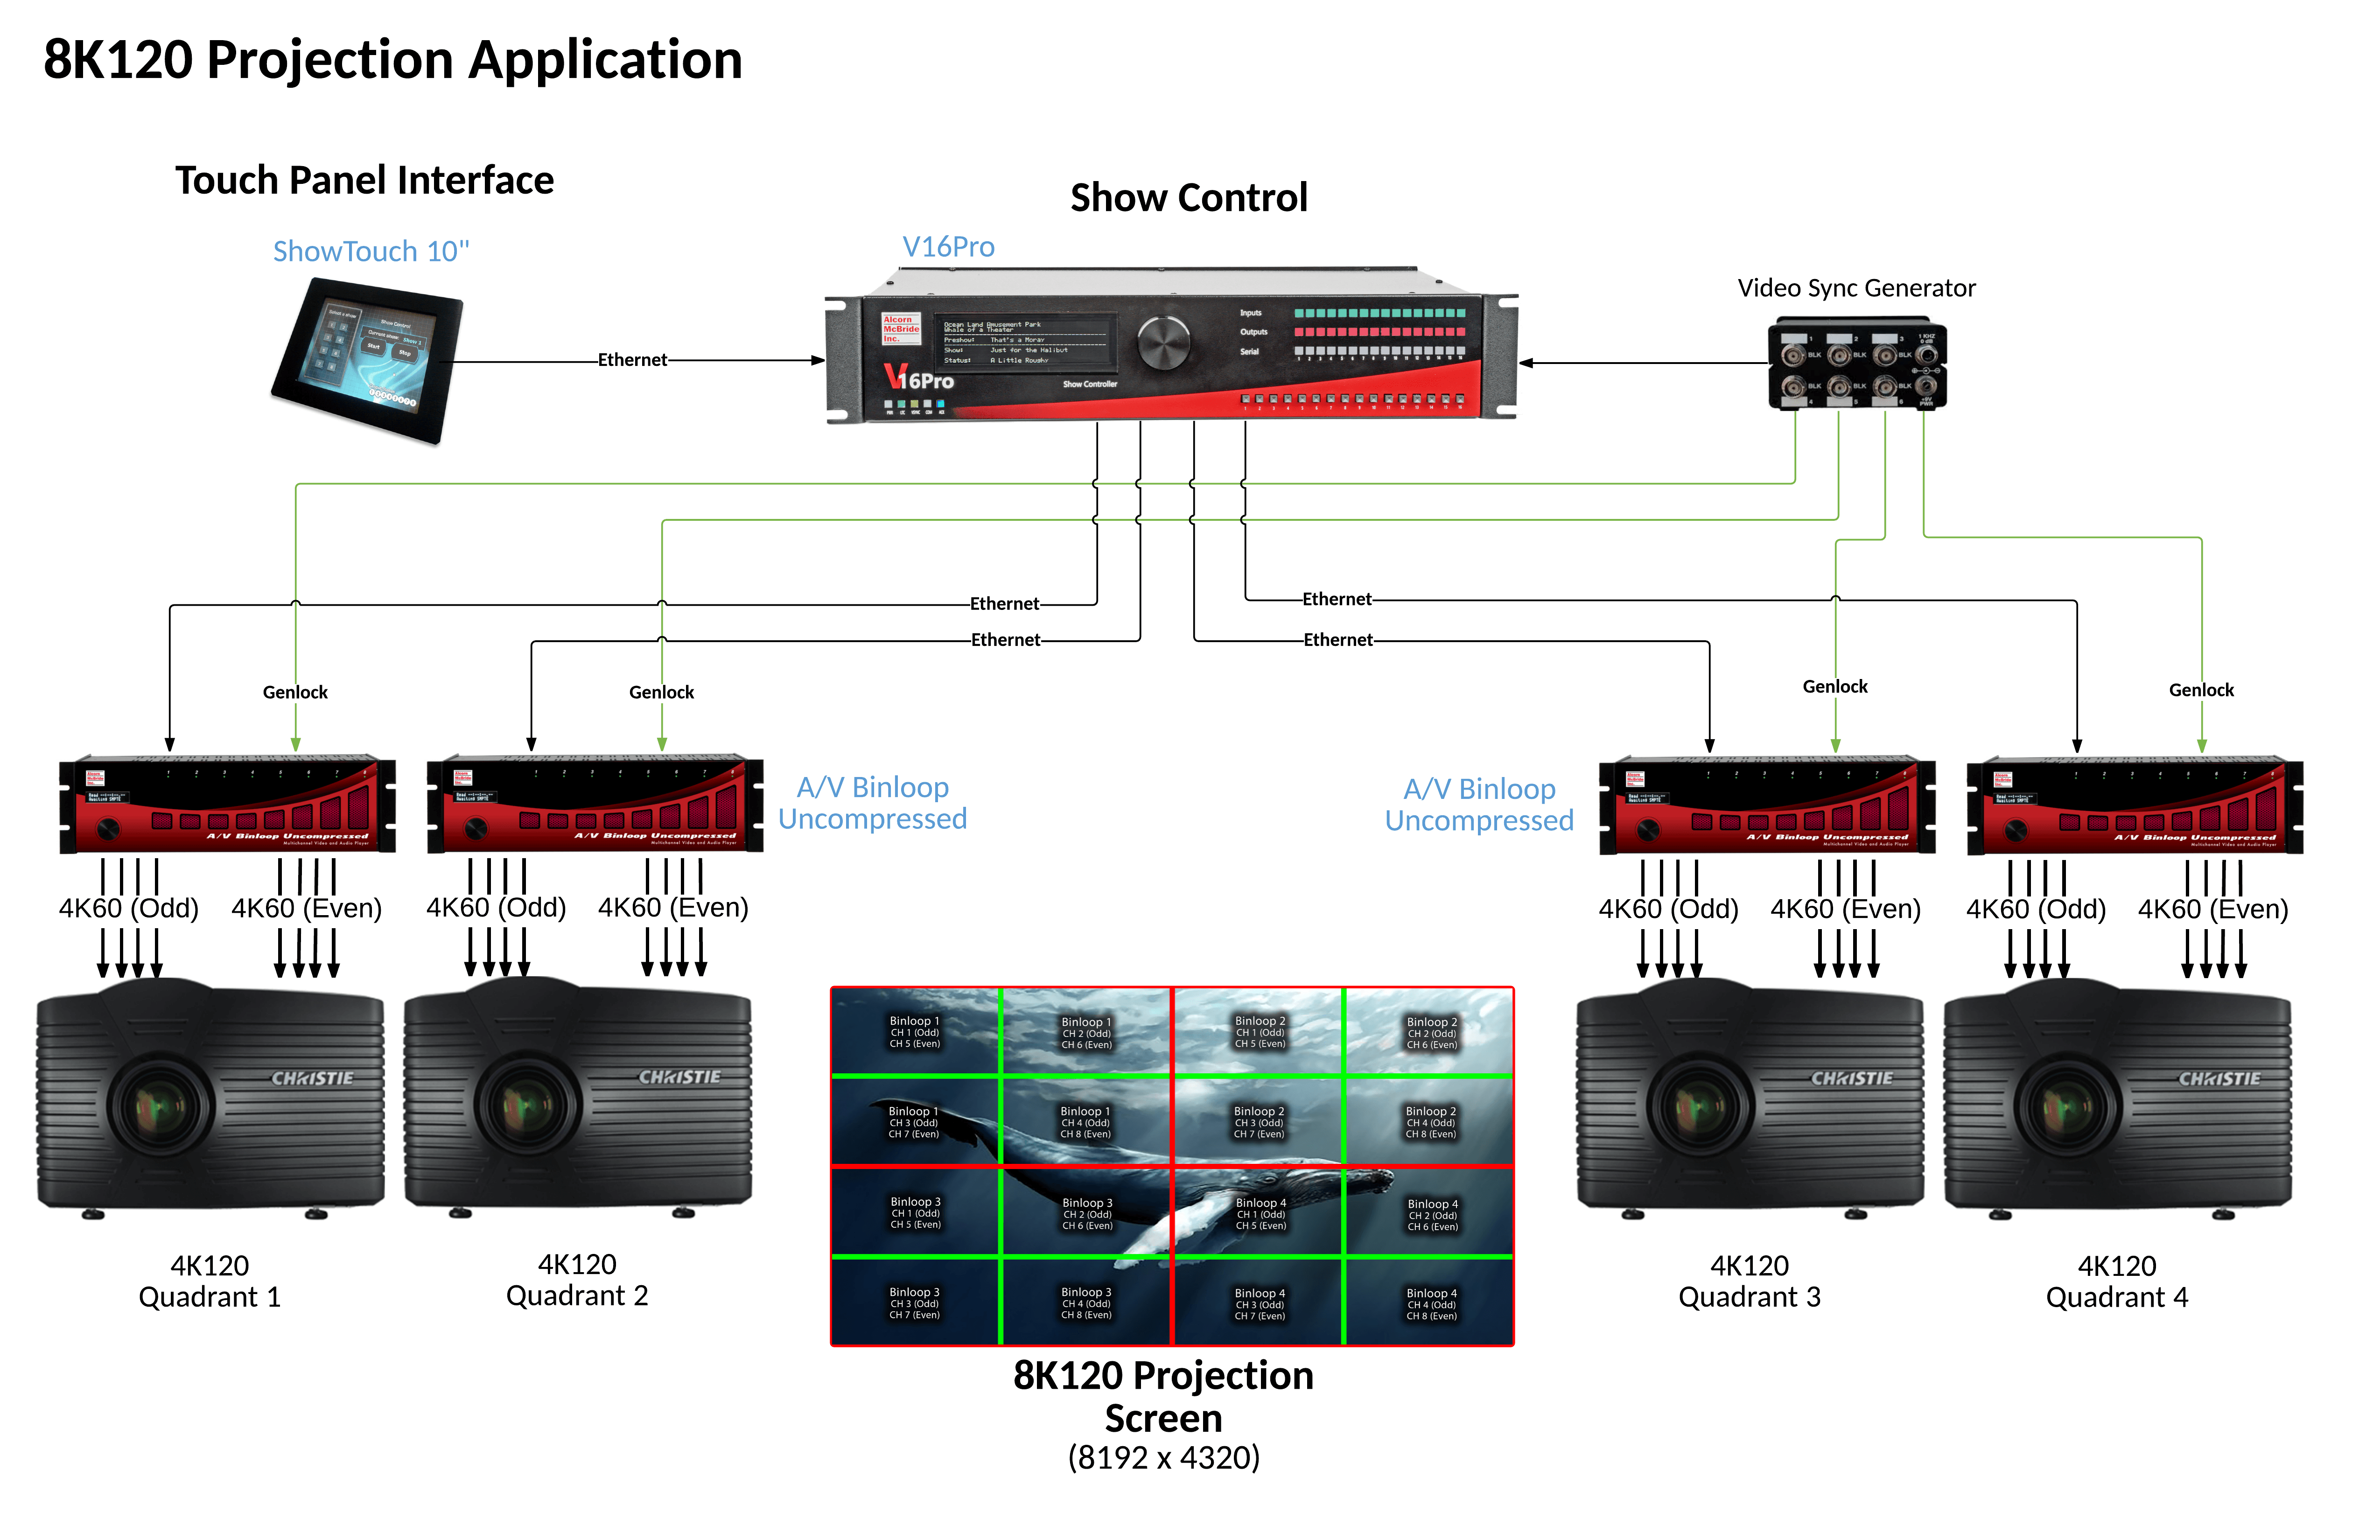
 Modern-themed entertainment projects are pushing the limits of what current projection technologies can offer to provide the ultimate guest experience. In situations, such as rides, where guests are in close proximity to the projection screen, high resolution, and high frame rate are essential to maintaining a good viewing experience. The superb uncompressed quality, high resolution, and high framerate playback offered by the AV Binloop Uncompressed make it ideal for these types of applications. Unlike PC-based server solutions, this product uses true Genlock to ensure perfect synchronization between units. This makes applications like 8K120 projection simple to implement with an ultra-reliable platform that’s not going to ruin the show experience with pop-up windows, OS updates, or many of the other pitfalls associated with PC-based servers. When you add the flexibility of an Alcorn McBride V16Pro show controller and our ShowTouch panels, you can easily integrate synchronous control of other equipment while also providing operators with easy touch panel control, scheduling, and monitoring of the system.
