Products Designed for Themed Entertainment
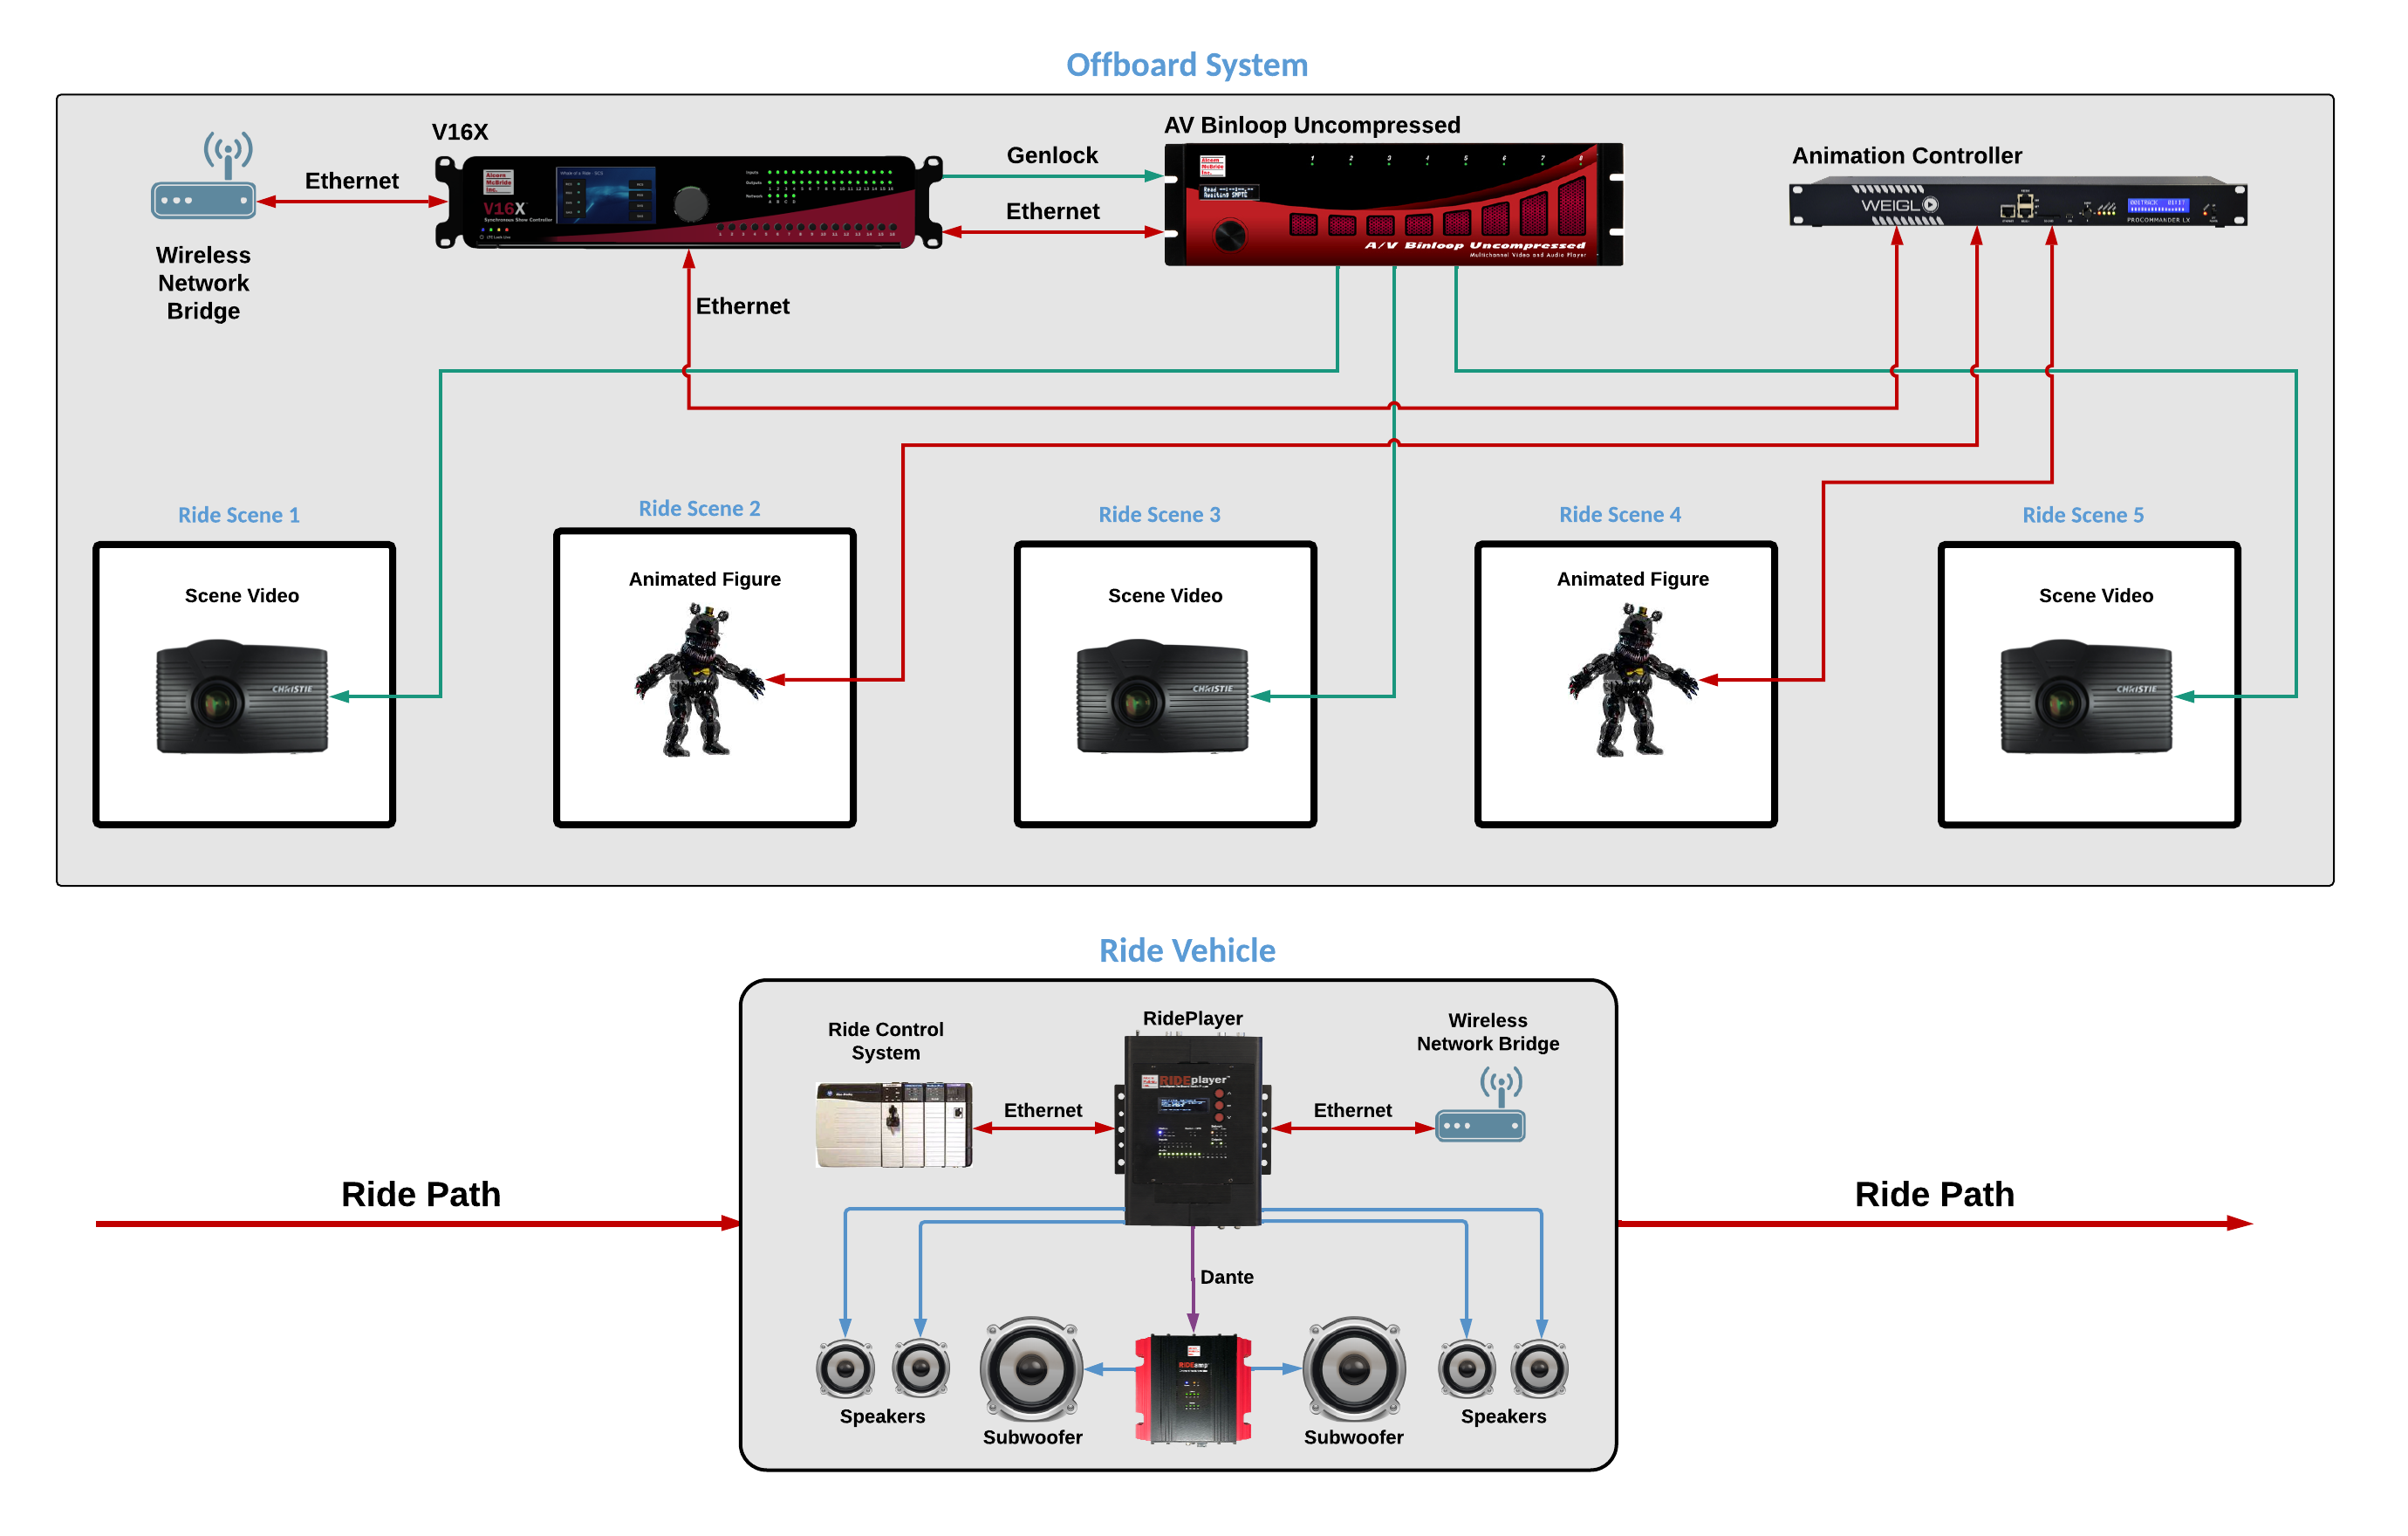
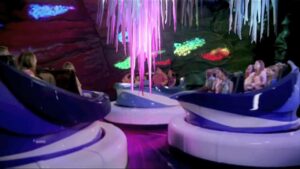 Dark Rides are often the main attractions of major theme parks. They incorporate everything from highly themed scenery, props, video, audio, animatronics, lighting, and ride systems. The tricky part is getting these systems to synchronize nicely with one another to provide a great guest experience. This is especially difficult considering that most ride vehicles have no hard-wired connection to the rest of the ride system. This application note demonstrates how revolutionary products such as V16X, RidePlayer, RideAmp, and the AV Binloop Uncompressed make these types of applications a breeze to implement.

